This tutorial will guide you through pulling ContextHub data into Power BI using Power Query. We'll cover the following steps:
- Setting up parameters to make the queries dynamic.
- Writing queries for API interaction.
- Explaining how to configure the entire setup step by step.
In this example, we will use a context type filter and a time filter. However, other filters are also available and can be applied similarly.
Step 1: Define Parameters
To make the queries dynamic, define the necessary parameters in Power Query Editor. Make sure to change the name to the given name, otherwise the script won’t work.
How to Add Parameters
- Open Power Query Editor.
- Go to the Manage Parameters section in the toolbar.
- Click New Parameter to define a parameter.
Required Parameters:
- ServerURL
- Name: ServerURL
- Description: The base URL of your TrendMiner server.
- Type: Text
- Current Value: Enter your TrendMiner server URL (e.g., https://myserver.trendminer.com).
- Item Type List
- Name: itemTypeList
- Description: List of context item types to filter.
- Type: Text
- Current Value: Example: ANOMALY|CALC_ON_DEMAND.
- make sure to use the Context Type technical identifier more info
- Time Frame Pulled
- Name: TimeFramePulled
- Description: Specifies the time frame for retrieving context items.
- Type: Text
- Current Value:
- Relative | 500 (for a relative period of 500 hours).
- Absolute | 2023-01-01 | 2023-12-31 (for a fixed interval).
Step 2: Write the Queries
Below are the essential queries you'll need to interact with the TrendMiner API. Make sure to change the name to the given name, otherwise the script won’t work.
1. Request Token
The first step is to request an authentication token. Use the following query to retrieve your token:
()=>
let

    token_body = [
          grant_type="client_credentials",
          client_id="CLIENT_ID",
          client_secret="CLIENT_SECRET"
         ],

    token_request = Json.Document(Web.Contents(@ServerURL,
        [
            RelativePath = "/auth/realms/trendminer/protocol/openid-connect/token",
            Headers = [#"Content-Type" = "application/x-www-form-urlencoded"],
            Content = Text.ToBinary(Uri.BuildQueryString(token_body))
        ])),

    token = token_request[access_token]

in
    token
Name: requestToken
Tip: You’ll need your client credentials for this query. These can be created by your admin in ConfigHub. For more details, consult your admin or check our documentation.
2. Check Context Type
To ensure your query doesn’t fail, this query checks if a specific context type exists:
(contextType as text) =>
let

    AuthKey = "Bearer " & @requestToken(),

    ci_view_body =
        [
            filters = {
                    [type="TYPE_FILTER", types={contextType}]
                }
        ],

    myRequest = Json.Document(Web.Contents(@ServerURL,
        [
            RelativePath="/context/item/search?size=1&page=0",
            Content=Json.FromValue(ci_view_body),
            Headers=[Authorization=AuthKey, #"Content-Type"="application/json"]
        ]))

in
    myRequest
Name: typeValidityCheck
Tip: If you use other type of filters, other than the type filter it is advised to do the same kind of check.
3. Retrieve Context Items
This query retrieves all context items for the specified context type(s) and time frame.
(contextType as list) =>
let

    AuthKey = "Bearer " & @requestToken(),

    ci_view_body =
        if Table.FirstValue(TimeFrame) = "Relative" then
            [
                filters = {
                    [type="TYPE_FILTER", types=contextType],
                    [type="PERIOD_FILTER", period="PT"& TimeFrame{0}[t0] &"H"]
                },
                fetchSize = 4000
            ]
        else
            [
                filters = {
                    [type="TYPE_FILTER", types=contextType],
                    [type="INTERVAL_FILTER", startDate=TimeFrame{0}[t0], endDate=TimeFrame{0}[t1]]
                },
                fetchSize = 4000
            ],


    myRequest = Json.Document(Web.Contents(@ServerURL,
        [
            RelativePath="/context/v2/item/search",
            Content=Json.FromValue(ci_view_body),
            Headers=[Authorization=AuthKey, #"Content-Type"="application/json"]
        ]))

in
    myRequest
Name: getContextItems
Step 3: Using the Queries and Tables
Make sure to change the name to the given name, otherwise the script won’t work.
1. Process the Time Frame Parameter
This table processes the TimeFramePulled parameter into a structured format.
let
    Source = TimeFramePulled,
    #"Split Text" = Text.Split(Source, "|"),
    #"Converted to Table" = Table.FromList(#"Split Text", Splitter.SplitByNothing(), null, null, ExtraValues.Error),
    #"Transposed Table" = Table.Transpose(#"Converted to Table"),
    #"Split Column by Delimiter" = Table.SplitColumn(#"Transposed Table", "Column2", Splitter.SplitTextByDelimiter(";", QuoteStyle.Csv), {"Column2.1", "Column2.2"}),
    #"Changed Type" = Table.TransformColumnTypes(#"Split Column by Delimiter",{{"Column2.1", type text}, {"Column2.2", type text}}),
    #"Renamed Columns" = Table.RenameColumns(#"Changed Type",{{"Column2.1", "t0"}, {"Column2.2", "t1"}, {"Column1", "timeframeType"}}),
    #"Trimmed Text" = Table.TransformColumns(#"Renamed Columns",{{"timeframeType", Text.Trim, type text}, {"t0", Text.Trim, type text}, {"t1", Text.Trim, type text}})
in
    #"Trimmed Text"
Name: TimeFrame
2.Process the Item Type List
This table splits the itemTypeList parameter into individual item types.
let
    Source = Text.Split(@itemTypeList, "|"),
    #"Converted to Table" = Table.FromList(Source, null, {"userDefinedTypes"}),
    #"Changed Type" = Table.TransformColumnTypes(#"Converted to Table",{{"userDefinedTypes", type text}})
in
    #"Changed Type"
Name: all_types
3. Retrieve and Process Context Items
This table retrieves and processes context items based on the input parameters.
let
    Source = getContextItems(all_types[userDefinedTypes]),
    content = Source[content],
    #"Converted to Table" = Table.FromList(content, Splitter.SplitByNothing(), null, null, ExtraValues.Error),
    #"expand Items" = Table.ExpandRecordColumn(#"Converted to Table", "Column1", {"identifier", "description", "createdBy", "components", "type", "fields", "keywords", "startEventDate", "endEventDate"}, {"identifier", "description", "createdBy", "components", "type", "fields", "keywords", "startEventDate", "endEventDate"}),
    #"Expanded type" = Table.ExpandRecordColumn(#"expand Items", "type", {"name"}, {"contextType"}),
    #"Expanded components" = Table.ExpandListColumn(#"Expanded type", "components"),
    #"Expanded components1" = Table.ExpandRecordColumn(#"Expanded components", "components", {"name"}, {"contextComponentTag"}),
    #"Changed Type" = Table.TransformColumnTypes(#"Expanded components1",{{"startEventDate", type datetime}, {"endEventDate", type datetime}}),
    #"Added Custom" = Table.AddColumn(#"Changed Type", "Duration (Days)", each [endEventDate]-[startEventDate]),
    #"Changed Type1" = Table.TransformColumnTypes(#"Added Custom",{{"Duration (Days)", type number}}),
    #"Added Custom1" = Table.AddColumn(#"Changed Type1", "Duration (Minutes)", each [#"Duration (Days)"] * 24* 60)
in
    #"Added Custom1"
Name: Context_Items
You should now have a table including all your context items which you can further use in your PowerBI reports.
Troubleshooting tips:
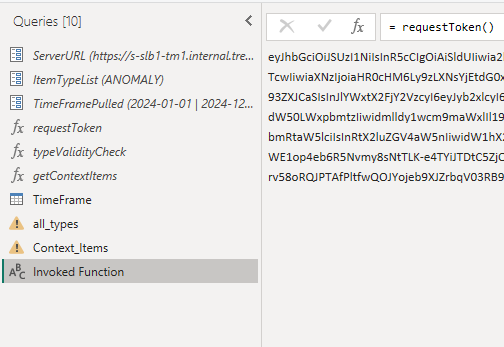
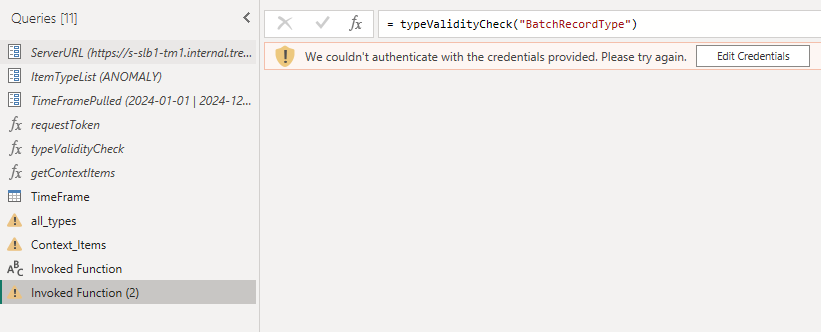
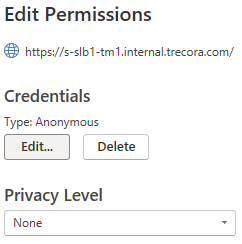
- You need to connect anomalously when using the requestToken function.
- Invoke the requestToken function to ensure you have a live connection to the TrendMiner server.
- Check if you named all the parameters and functions correctly.
- Check if you used the Context Type name instead of the technical identifier.

