

Background
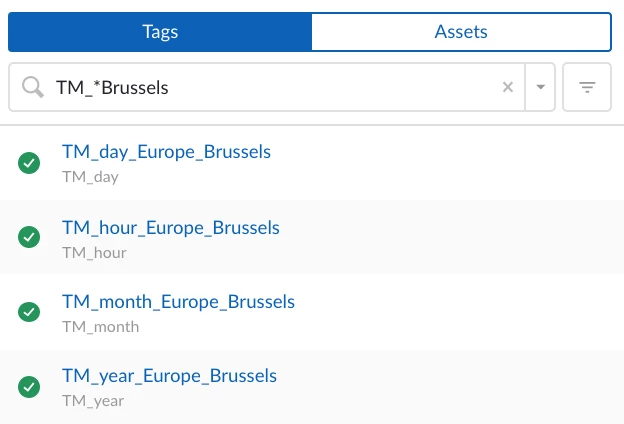
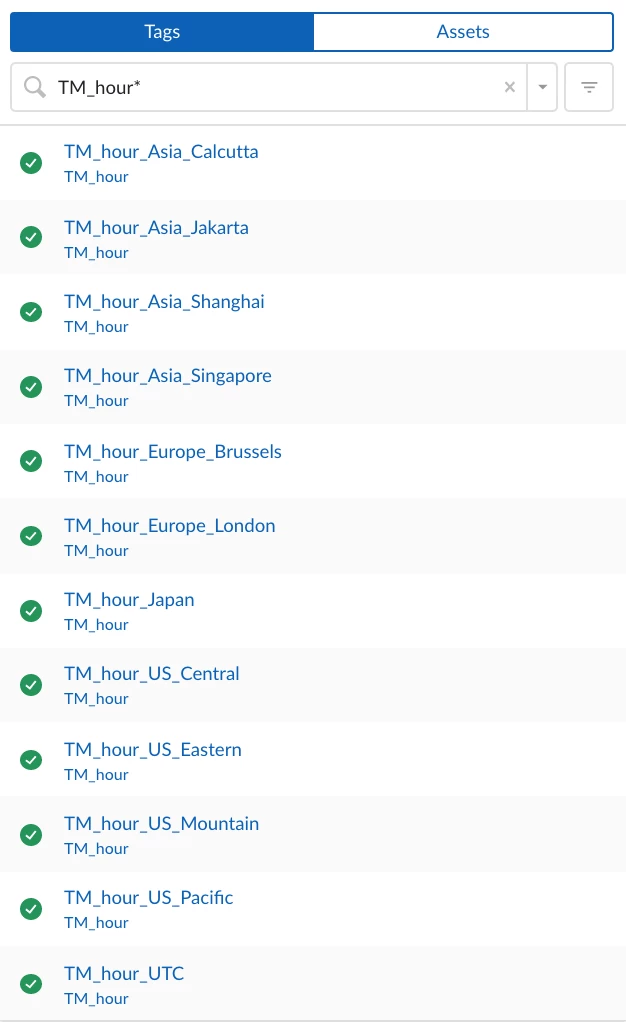
TrendMiner provides a set of Time/Date Tags by default with installation. These tags deliver time and date information directly from the system – independent of any process data – and are available for all time zones:
-
TM_hour_* – Hour of the day
-
TM_day-* – Day of the month
-
TM_month_* – Month
-
TM_year_* – Year
They allow for precise configuration of searches, calculations, or monitors tied to specific moments or recurring time patterns – think daily reports at a fixed time or tracking values at the beginning of each month.
For full details, see the User Guide.
🎓 Deep Dive & Training Resource
Want to go further? Check out these advanced trainings for practical, hands-on examples:
-
Mastering Tag Types in TrendMiner – Tips, Tricks & Hands-On Exercises (Exercise 3)
-
Event Analytics in Action: Gain Deeper Process Insights (Exercise 2)
🌟 Community Inspiration – Related Posts
Here are great examples of how Time/Date Tags are already in action:
- 📊 Daily raw material consumption report
-
📆 How to calculate a daily average of a signal with a single result per day
🛠 Further Practical Tips & Tricks with Time/Date Tags
📧 Tip 1: Daily Email at a Specific Time with Dashboard Link
Benefit: Automatically receive a daily update via email – complete with a direct link to your live dashboard.
Steps:
-
🖥 Create a Live Mode dashboard showing your process overview, then copy the URL.

Live Mode in DashHub -
🔍 Set up a value-based search in TrendHub using Time/Date Tags (e.g., when time is 6 am for 2 minutes, here: daily) and save it.
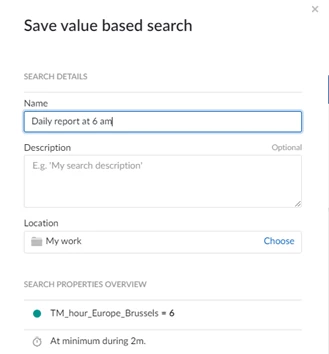
Value based search -
📩 Create a monitor to send an email every day at 6:02 AM, pasting in the dashboard URL.
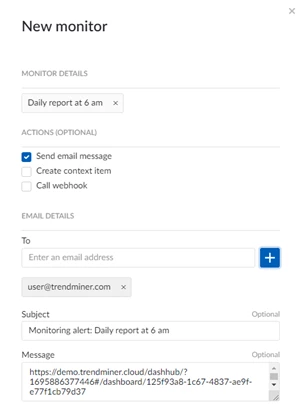
Enable a monitor 💡 Pro tip: Combine multiple dashboards/views by adding more links into the same email.
📊 Tip 2: Display a Value at a Fixed Time on a Dashboard for 24 Hours
Benefit: Capture a measurement at a precise time (e.g., 6:00 AM) and have it displayed in your dashboard tile until it updates the next day at the same time.
Steps:
-
🧮 Create a new formula with the value and the time of interest (e.g., at 6 am):
if(and(A=B,A=6),abs(C),0)
Variable mapping:
-
A = TM_hour_* (based on your time zone)
-
B = TM_hour_* shifted by 59 minutes 59 seconds
-
C = tag with your desired measurement
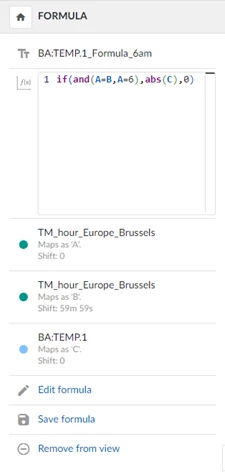
Create a formula
-
-
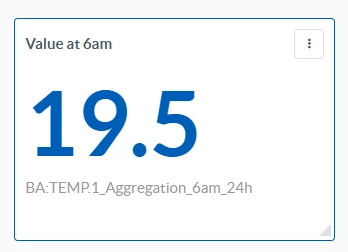
📐 Create an aggregation based on the previous formula to receive the constant value measured at a specific time for the next 24 hours:
-
Tag: formula from step 1
-
Operator: Maximum
-
Direction: Backward
-
Interval: 24 hours

Create an aggregation
-
-
📌 Add a Current Value tile to your dashboard using the aggregation tag as the component.
Current valie tile in DashHub
💬 Conclusion / Call to Action
With Time/Date Tags, TrendMiner empowers you to align your analyses, reports, and monitors with exact time points—making it easy to automate workflows and empower timely decisions.
Now it’s your turn: How are you using Time/Date Tags in your workflows? Share your tips, dashboards, or clever formulas in the comments—we’d love to hear them!